How to Create and Sell Online Courses for Beginners
Published: 5 Nov 2026
How to Create and Sell Online Courses for Beginners
Introduction
If you know how to do something that other people want to learn, you may already have the starting point for an online course. You do not need to be a famous expert, a professional teacher, or a technology specialist. You need a clear topic, a simple plan, and a practical way to help a beginner move from confusion to confidence.
An online course is a structured learning experience that students can follow at their own pace. It usually combines short video lessons, simple written guidance, and small practice tasks. Creating a course takes real work, but it does not have to be complicated. Many beginners make the mistake of trying to teach everything they know at once. A better approach is to choose one clear outcome, break it into small lessons, and teach only what the student needs to reach that outcome. In this guide, you will learn how to choose a topic, plan your lessons, record with simple equipment, choose a platform, set a fair price, and launch your course without feeling overwhelmed. The goal is a helpful, honest course that solves one real problem well.

Choose a Topic People Actually Want to Learn
The best course topics sit at the meeting point of three things: what you know well, what you enjoy explaining, and what other people are actively trying to learn. If you choose only a topic you love, but no one is searching for help with it, selling will be difficult. If you choose only a popular topic, but you have little experience with it, teaching will feel forced and students will notice.
Start by listing skills you have used in real life. These might come from your job, a hobby, freelance work, or a problem you solved for yourself. For example, you might know how to organise a small budget, design simple social media graphics, write clear emails, cook everyday meals, or use a tool such as a spreadsheet or a photo editor. The skill does not need to be advanced. Next, look for signs of demand. Read questions in blog comments, social media groups, forums, and search suggestions related to your topic. If the same beginner questions appear again and again, that is a useful signal. Finally, narrow your topic to one specific result. Instead of a broad course on photography, for example, you could teach how to take clear product photos with a phone at home. Instead of a general course on writing, you could teach how to write a first blog post from idea to publication. A narrow promise is easier to plan, easier to explain, and easier for a student to trust.
Plan Your Course Before You Record Anything
Planning first saves time, reduces stress, and keeps your course focused. Before you open your recording software, write down the outcome in one sentence. For example: by the end of this course, the student will be able to create a simple weekly budget and track spending for one month. Every lesson should help the student move closer to that outcome. If a lesson does not, leave it out or save it for a future course.
Now break the outcome into four to seven modules. Each module should cover one stage of the journey. Inside each module, plan short lessons of five to twelve minutes each. Short lessons are easier to record, easier to update, and easier for busy students to finish. Note the main point, one example, and one action step for the student. This keeps your teaching natural while making sure you do not forget important details. You can also plan worksheets, checklists, or templates that support the lessons.

At this stage, decide how long the course should be. A first course does not need to be long. A focused course of one to three hours, made up of short lessons, is often enough for a beginner topic. Students value clarity and progress more than a large number of hours. A shorter, well-organised course is also easier for you to finish, which matters more than an ambitious plan that never reaches publication.
Record Simple, Clear Lessons
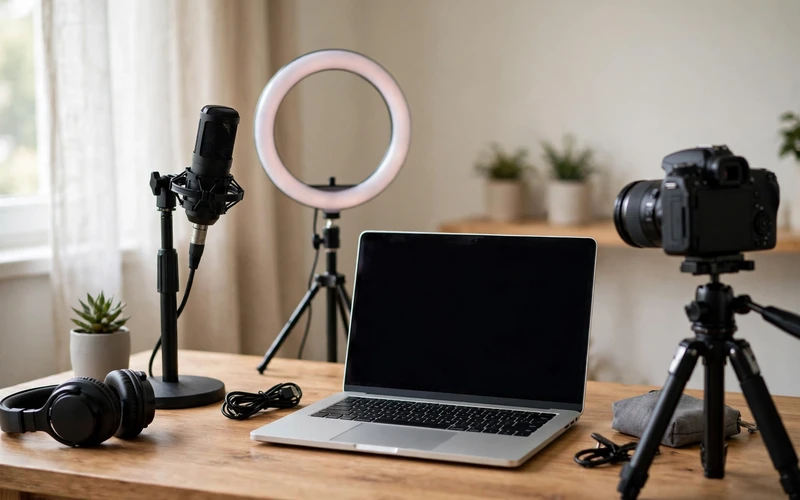
Many beginners delay recording because they believe they need expensive equipment. In most cases, you do not. A quiet room, natural light or a basic lamp, a clear microphone, and a phone or laptop camera can be enough to start.
Before recording a full course, record one short test lesson. Listen to it with headphones, check the lighting, and watch for distracting background noise. When you record, speak slowly and clearly, as if you are helping one person sitting next to you. Show your screen when you are teaching a practical skill, and explain each step as you do it. Simple editing tools can remove pauses and mistakes later, so you do not need a flawless first take.
After recording, add a short introduction to each lesson, clear lesson titles, and, where helpful, captions or a written summary. These small details make the course easier to navigate and more accessible. Remember that your first course does not need Hollywood-level production. It needs lessons that are easy to hear, easy to see, and easy to follow.
Choose the Right Platform for Your First Course
You have several options for hosting and selling a course, and the best choice depends on your experience, budget, and audience. Some platforms handle payments, video hosting, and student access for you, while others give you more control but require more setup. For a first course, simplicity is usually more valuable than advanced features. A dedicated course platform usually gives you more control over pricing and branding, but you will need to bring your own students through your blog, email list, or social media. Selling from your own website gives you the most control, but it also means managing payments and student access yourself, which can be more work for a beginner. Also test the student experience yourself. Enrol as a test student, watch a lesson, and try the navigation. If the platform feels confusing to you, it will probably feel confusing to your students too.
The table below compares common approaches in general terms. The figures are illustrative only and are meant to help you think through the trade-offs, not to describe any specific platform or guarantee.
| Approach | Main advantage | Main drawback | Best for beginners who |
|---|---|---|---|
| Course marketplace | Built-in audience | Less pricing control | Want discovery help and simple setup |
| Dedicated course platform | More control over pricing | You bring the audience | Already have a blog or email list |
| Your own website | Full control | More technical setup | Want full ownership and can manage tools |
| Email and simple checkout | Low setup cost | Limited course features | Are testing a small first course |
Whichever route you choose, keep your course files organised, back up your videos, and keep a simple list of lesson titles and updates. Good organisation makes future updates much easier.
Set a Fair Price Without Guessing
Pricing is often the hardest part for beginners, and there is no single correct price for every course. A useful starting point is to consider the value of the outcome, the length and depth of the course, and what similar beginner courses in your niche typically charge. A short introductory course will usually be priced lower than a detailed course with templates, feedback, and a final project. A course that helps someone save time, avoid a costly mistake, or learn a skill they can use at work may be worth more to them than a course that only covers general information. At the same time, an honest price builds trust. Do not inflate the price with claims you cannot support, and do not promise results you cannot guarantee.
You can also offer a simple launch price for early students, or a basic version and a fuller version with extra resources. Keep the options simple. Too many pricing tiers can confuse buyers. Whatever price you choose, make sure the checkout process is clear, the refund policy is stated honestly, and students know how long they will have access to the course. Many creators start with a modest price, gather student feedback, improve the course, and then raise the price for future students. Your first course is a learning experience for you as well as for your students, so a fair, simple price is a sensible place to begin.
Launch, Support Students, and Keep Improving
Launching a course does not mean shouting about it once and hoping for sales. A calm, helpful launch works better. Start by telling your existing audience what problem the course solves, who it is for, and what students will be able to do after finishing it. Share a free sample lesson, a checklist, or a short guide so people can see your teaching style before they buy.
Use your blog and email list if you have them, because readers who already trust your free content are more likely to consider a paid course. Write a clear sales page that explains the outcome, lists the modules, shows what is included, and answers common questions honestly. Avoid pressure tactics and exaggerated claims. A clear, respectful sales page builds long-term trust, which is far more valuable than a single rushed sale.

After launch, support your students. Answer questions, fix errors quickly, and welcome feedback. Student questions often reveal lessons that need clearer explanations or extra examples. Use that feedback to improve the course over time. Small updates, such as a clearer worksheet or an extra practice lesson, can make a big difference to student satisfaction. Building an audience takes time, and many courses grow slowly through recommendations, search traffic, and helpful free content. Keep improving the course, keep listening to students, and keep creating useful content around the same topic. Consistency and honesty will serve you better than a perfect launch day.
Conclusion
Creating and selling an online course as a beginner is possible when you keep the process simple and focused. Choose one clear topic, plan short practical lessons, record with basic equipment, pick a platform that fits your experience, set a fair price, and launch with honest, helpful messaging. You do not need to know everything, and you do not need expensive tools to begin.
Your first course may not be perfect, and that is normal. Start small, finish the course, listen to your students, and improve it as you learn. With each course, your teaching, your confidence, and your audience will grow together.
Frequently Asked Questions
How do I choose a topic for my first online course?
Choose a skill you have used in real life, that you enjoy explaining, and that other beginners are asking questions about. Then narrow it to one specific outcome, such as learning to create a simple budget, rather than a broad subject. A clear, narrow topic is easier to plan, teach, and sell.
Do I need expensive equipment to record a course?
No. A quiet room, good lighting, a clear microphone, and a phone or laptop camera are usually enough to start. Clear audio is more important than an expensive camera. Record a short test lesson first, listen to it carefully, and fix any sound or lighting problems before recording the full course.
How long should my first online course be?
A focused first course of one to three hours, broken into short lessons of five to twelve minutes, is often enough for a beginner topic. Students value clear progress more than a large number of hours. A shorter course is also easier for you to finish and update.
Which platform should I use to sell my course?
It depends on your audience and experience. A marketplace can help with discovery but offers less pricing control. A dedicated course platform gives you more control but requires you to bring your own students. For a first course, choose the simplest option that handles payments, video hosting, and student access well.
How much should I charge for my first course?
Consider the value of the outcome, the depth of the course, and what similar beginner courses charge. Start with a fair, simple price rather than guessing a high figure. You can gather feedback, improve the course, and adjust the price later as the course and your audience grow.
How do I find students for my course?
Start with people who already follow your blog, email list, or social media. Share helpful free content on the same topic, offer a sample lesson or checklist, and explain clearly who the course is for and what it will help them achieve.
Do I need to be an expert to teach an online course?
No, but you should be honest about your level and teach what you genuinely know. Many successful beginner courses are taught by people who are one or two steps ahead of their students. Focus on practical steps, real examples, and clear explanations rather than claiming expert status you do not have.
How can I improve my course after launching it?
Listen to student questions and feedback, fix errors quickly, and update lessons that students find confusing. Small improvements, such as clearer worksheets, extra examples, or a new practice lesson, can greatly improve the student experience.






- Be Respectful
- Stay Relevant
- Stay Positive
- True Feedback
- Encourage Discussion
- Avoid Spamming
- No Fake News
- Don't Copy-Paste
- No Personal Attacks
- Be Respectful
- Stay Relevant
- Stay Positive
- True Feedback
- Encourage Discussion
- Avoid Spamming
- No Fake News
- Don't Copy-Paste
- No Personal Attacks
